Skip to content

Category: In The Kitchen

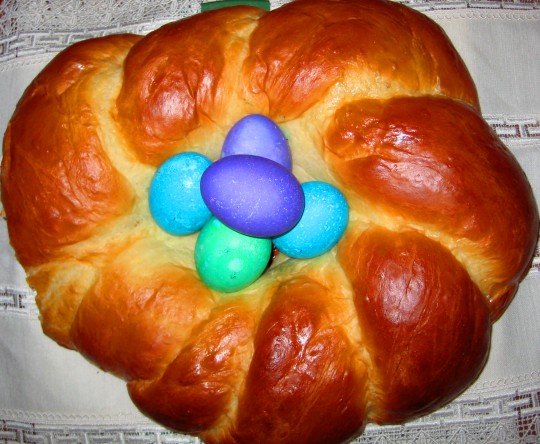
In The Kitchen: Mom’s Easter Bread

Originally posted on FineDiners.ca

easter_bread

Last year around this time my sister and I got together to do some Easter baking with the intention of writing up a post on our adventures for this site.  As with many of my intentions for this site, this post kept slipping through the cracks and just didn’t end up getting written up in time for a proper Easter post, and now that it’s come back around again, I figure I ought to get something up.

Our family has Ukrainian heritage on our father’s side, and while we got to experience a lot of the wonderful Ukrainian Easter traditions through our Baba (grandmother) as we grew up, much of that has faded away as we’ve all grown into our own lives and adopted our own traditions.  This delicious traditional Easter bread is a vestige of our heritage that has survived and been passed down.  Our version turned out a touch lopsided, but it was yummy nonetheless!

Mom’s Easter Bread

¼ cup warm water
2 tsp dry yeast
½ cup sugar
1 tsp salt
4 cups flour
1 cup milk, room temperature
2 large eggs, well beaten
1/3 cup butter, melted
Glaze:  1 tbsp water
White from 1 large egg

Sprinkle the yeast on the ¼ cup warm water and leave for 3 minutes.
Add sugar, salt and 3 ½ cups flour.
Stir the yeast mixture; slowly pour into the bowl and stir in.

Add the 2 beaten eggs to the milk.
Slowly pour the milk, eggs and melted butter into the bowl.
Knead.
If the dough is very, very sticky, add the remaining ½ cup flour, a little at a time, until the dough is just a little sticky.

Place in bowl and brush all over with melted butter and cover with a damp tea towel.
Place bowl in oven with light on and let rise for 1 ½ hours.
Remove dough from oven and pound it on a floured board until it is flattened.

Divide the dough in half and roll each half  into a rope about 28 inches long.
Twist the ropes loosely together, braid fashion.
Place the twisted dough on a greased cookie sheet and bring the ends together so they won’t separate during baking.
Return dough to oven with light on and leave for 40 minutes.

To Make the Glaze:  Stir together the water and egg white.

Remove the dough wreath from the oven and brush it with the glaze.  Heat oven to 325°F.  Bake wreath on the middle rack for about 28 minutes.
Makin’ Bacon Part 2: The Cure

Originally posted on FineDiners.ca

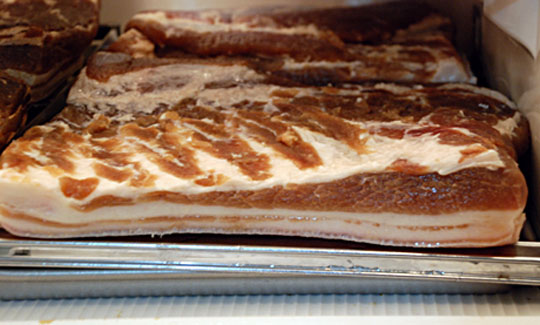
fridge_bacon

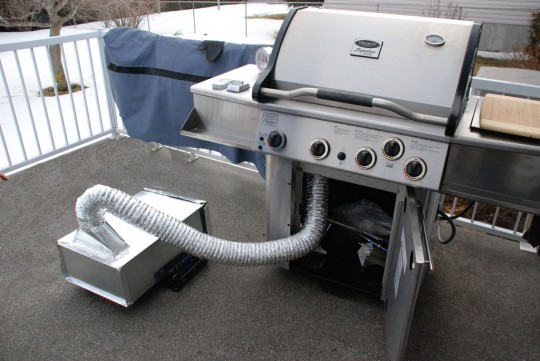
Well things have been so busy in and out of the kitchen, I haven’t had a chance to sit down and write the follow up to Makin’ Bacon.  Now that I have some spare time and have peaked your interest with the Sci-fi smoker, here’s the follow up.

I should have written this article first, as this was actually the first step, leading up to the Makin’ Bacon DIY smoker, but that article was way more fun.  As discussed in the previous article, we purchased the pork bellies from Lavergn Western Beef in Navan Ontario – this place is a must stop for a foodie!

The whole process of making bacon starts with the curing process.  The meat should be coated in salt and other spices and stored in the fridge for 7 days.  We broke our bellies down into different sized cuts and stored them in large ziploc bags with different cures in them.  The meat should be turned over every day to ensure a proper cure.

On the 7th day, remove the bellies from the cure, rinse them off thoroughly under water and let air dry in the fridge for 12 hours – this drying process will form what is called the pellicle, a tacky film that will allow the smoke to adhere to the meat. This is a crucial step in the making bacon process.

We tried several different spice combinations for the cure.  We did a BBQ blend, a sea salt and maple blend, black pepper and thyme, and a final combination of kosher salt, brown sugar and maple syrup.  This last one was the most successful in my opinion.

Finding the proper ratio is the tricky part.  On our first attempt we tried 2 parts salt to one part sweet – this batch turned out way too salty.  The second crack at it we tried a 1 to 1 ratio, but we found the end product was not salty enough.  In the first case, it is possible that all we needed to do was spend some more time rinsing the bellies after the curing process, but I’m not sure.

We have yet to try another combination, but I suspect something in between will get us where we want to be.  Since we use an outdoor cold smoking method, we won’t be able to try this out again until the winter – which of course in Ottawa, is never that far off…

Makin’ Bacon Part 1: DIY Cold Smoker

Originally posted on FineDiners.ca

cold_smoker_v2_money_shot

After several days of research, planning and preparation, FineDiner Dave and I got together at my parents place this weekend to smoke some bacon.  This article is the first in our three-part Makin’ Bacon Series.

Other articles in this series will explain the Curing process we used, as well as the actual Smoking and finishing of the meat, and we’ll probably get into some of the things we did with the final product.  One thing’s for sure, Makin’ Bacon is FUN and we’ll be doing plenty more of it!

REWARD: Pan Seared Beef Tenderloin and Fingerling Potatoes

Originally posted on FineDiners.ca

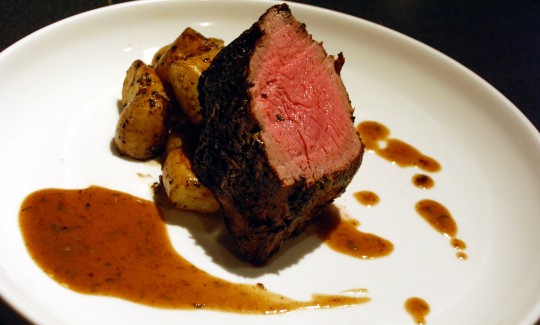
Pan Seared Beef Tenderloin and Fingerling Potatoes

So FineDiner Eric came over the other night and we butchered three Chickens and two whole Beef Tenderloins (which were on sale at Costco – instructional coming soon!).  As a reward for all our hard work, we fired up a chunk of the tenderloin and some fingerling potatoes and had ourselves an amazing late-night meal!

In The Kitchen – Fish in a Bag!

Originally posted on FineDiners.ca

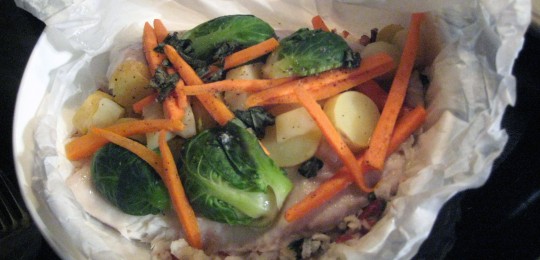
Fish in a bag!

This is my new favourite way to prepare fish!  FineDiner Eric turned me on to it – it’s so simple but yet so incredibly delicious, and it cuts down on the mess since you cook and eat it all in the parchment vessel.  I made this for the first time on Friday night and my girlfriend insisted that I cook it again on Sunday – and I’m sure we’ll be having it a lot more often from now on!

Midnight Snack – Oysters Rockefeller

Originally posted on FineDiners.ca by Eric Rochon

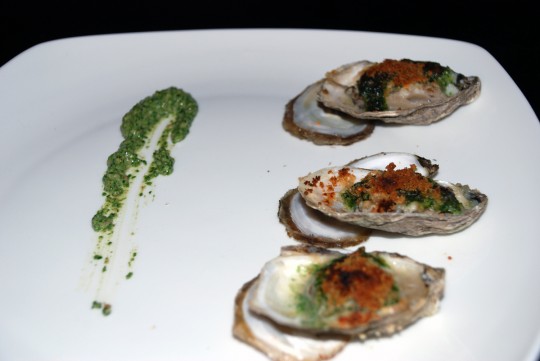
oysters

So it’s quarter to twelve, my buddy Marc shows up with thirty or so east coast oysters. Actually from the Mallet Oyster company in New Brunswick, they were the St-Simon ones. One of his co-workers is from the east coast and has access to the supplier that ships them directly  to Ottawa. I love oysters, so we proceeded to shuck and eat a dozen RAW.  Marc suggested we cook the rest.

In The Kitchen – Wine Marinated Braised Beef Short Ribs

Originally posted on FineDiners.ca

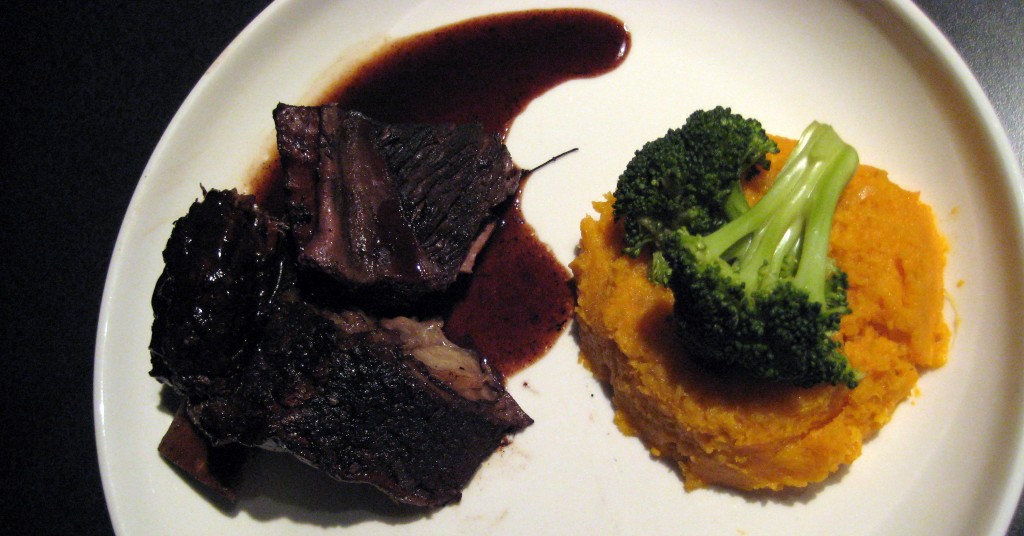
Wine Marinated Braised Beef Shortribs (aka Dave's HAMMERED Beef Shortribs)

Second Time’s a charm?
So this is my second go-around with braised beef short ribs – I LOVE this dish.  Last time was great, but I couldn’t stop thinking about the ways I could improve on my first attempt, now that I had a bit of experience with braising and in particular with this cut of meat.

This time around, I had spent quite a bit more time reading up on braising and different recipes, plus I’d gotten a few more tips and tricks from FineDiner Eric, and I felt I was ready to jump back in and see if I couldn’t hit this one out of the park.