Originally posted on FineDiners.ca
After several days of research, planning and preparation, FineDiner Dave and I got together at my parents place this weekend to smoke some bacon. This article is the first in our three-part Makin’ Bacon Series.
Other articles in this series will explain the Curing process we used, as well as the actual Smoking and finishing of the meat, and we’ll probably get into some of the things we did with the final product. One thing’s for sure, Makin’ Bacon is FUN and we’ll be doing plenty more of it!
We decided that we wanted to Cold Smoke our bacon. You can hot smoke bacon, but then you end up cooking the stuff twice – once while smoking, and then again when you’re serving it. Cold smoking preserves the moisture and fat in the meat while still giving it that great smokey flavour.
The trick with cold smoking is to make sure the temperature in your smoking chamber doesn’t hit more than 80 or 90 degrees – any higher and you get into risky territory in terms of the potential for bacteria. Typically a cold smoke setup involves a smoking chamber where the meat is laid or hung, and a separate smoke generator that produces the smoke that will be piped into the smoking chamber.
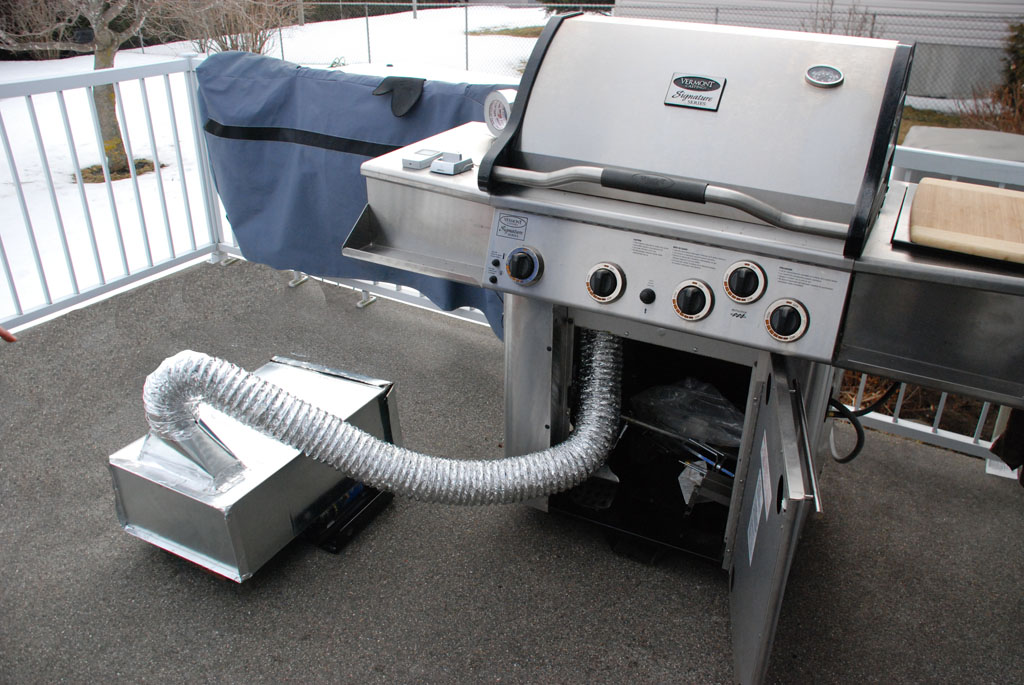
Our master plan was to create the smoke generator using duct work from Home Depot, then pipe the smoke from that chamber into my dad’s Vermont Castings BBQ, where we’d lay the pork bellies. Inside the BBQ, just to make sure the chamber stays nice and cool, we’d lay a pan of ice and snow to help cool the smoke as it enters the compartment.
Friday night, I went to Home Depot to pickup the goods. I purchased the following items to create the smoke generator:
1- 8″x16″ Duct Sheet 6′ length (13.99$)
1- 8″x16″ Block End (3.49$)
1- Rectangle to Round Boot (12.69$)
1- Air Diffuser aka Outdoor Dryer Vent (10.99$)
1- Dryer Hosing (5.29$)
1- Heat Resistant Tape (12.99$)
Total Cost: 67.17$
The next day, Dave and I drove to my parents place to begin our adventure of “MAKIN’ BACON”
Assembling the Heat Chamber
We cut the sheet metal in 2x 24″ lengths using tin snips. (Safety Tip: wear work gloves when doing this. We lost lots of blood in the process of assembling the sheet metal!)
After cutting the sheet metal we joined the 2 24″ pieces to create a box.
We then capped one end using the 8″x16″ Block End.
We sketched out where we wanted to have the smoke output (towards the capped end) and cut an appropriate sized opening for the boot, then we attached it and taped up the seams.
We then used the leftover sheet metal to fabricate an access door so we could access the inside compartment. We cut a hole in this end for the vent which we’d use to regulate airflow. (Lesson learned: do not use a plastic vent for this – see pictures below!)
Finally, we added the dryer hose to direct the smoke to the BBQ, using the heat-resistant tape to seal it up tight.
Once our build was complete we moved the entire assembly to my dad’s deck were we were going to do the smoking.

The Adventure really begins
Version 1.0 of the smoke generator was an accident waiting to happen. We had placed the Butane Burner Stove directly in the box, not thinking of the incredible amount of heat that would build up inside. Exposing the stove and butane canister to that kind of heat nearly had disastrous results!
We almost blew it up! 🙂
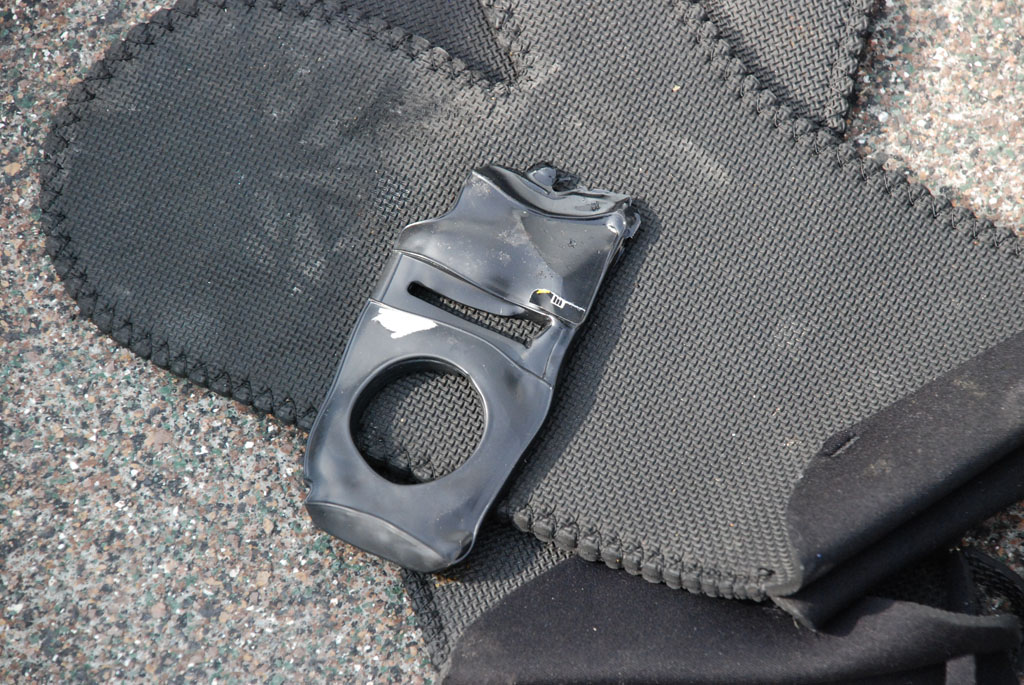
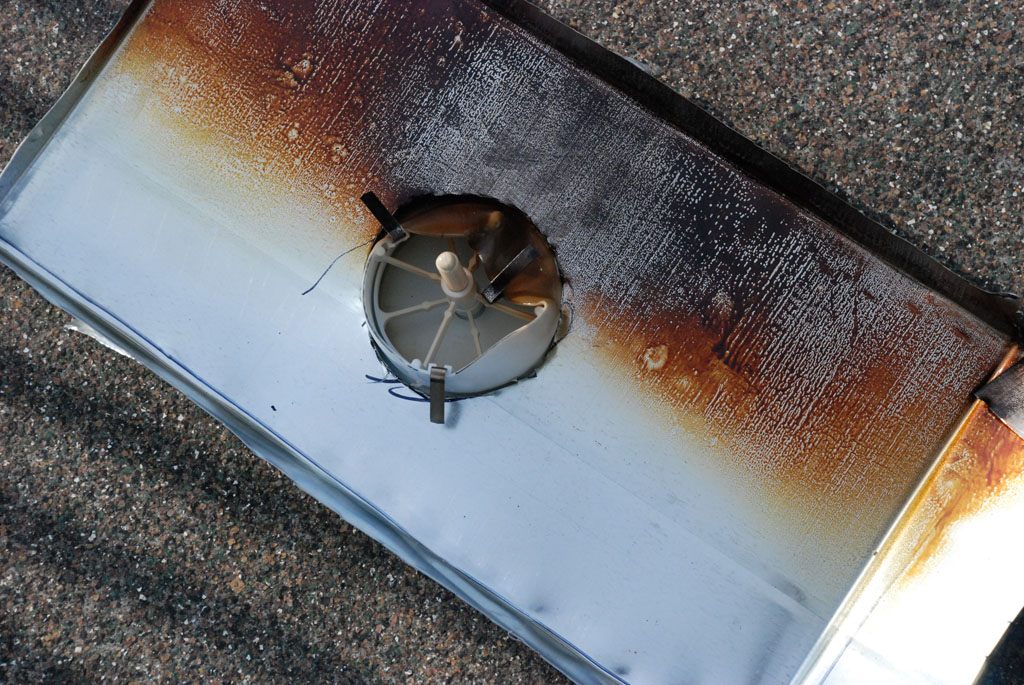
After noticing the oven had melted we went back to the workbench for some design modifications.
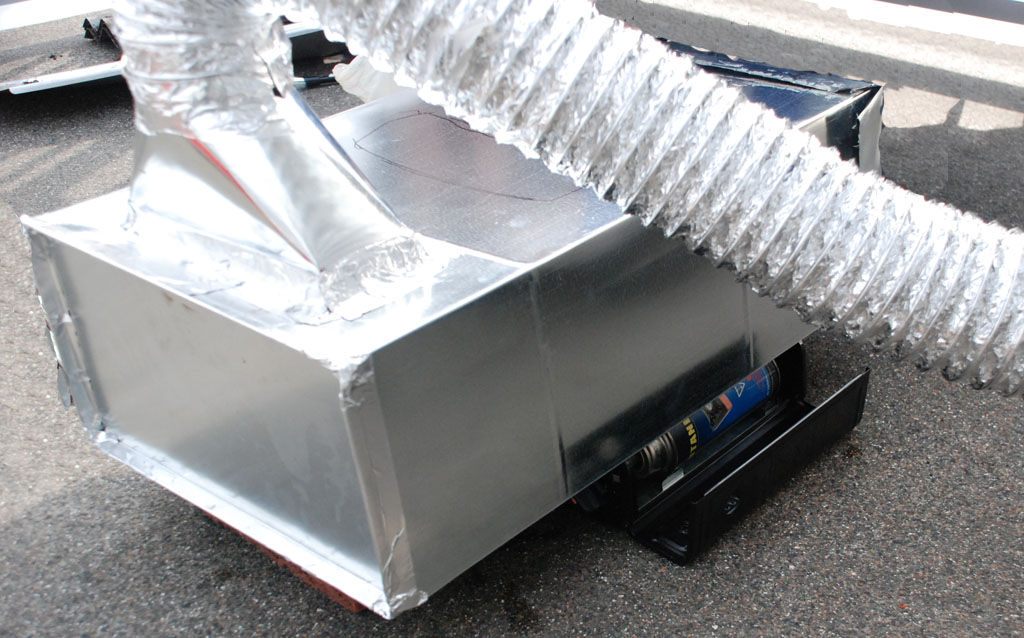
Version 2.0 – Instead of placing the Butane Burner Stove directly into the box we cut an opening in the bottom of the hot chamber to allow only the Grill portion of the range to enter the box. This was much safer.
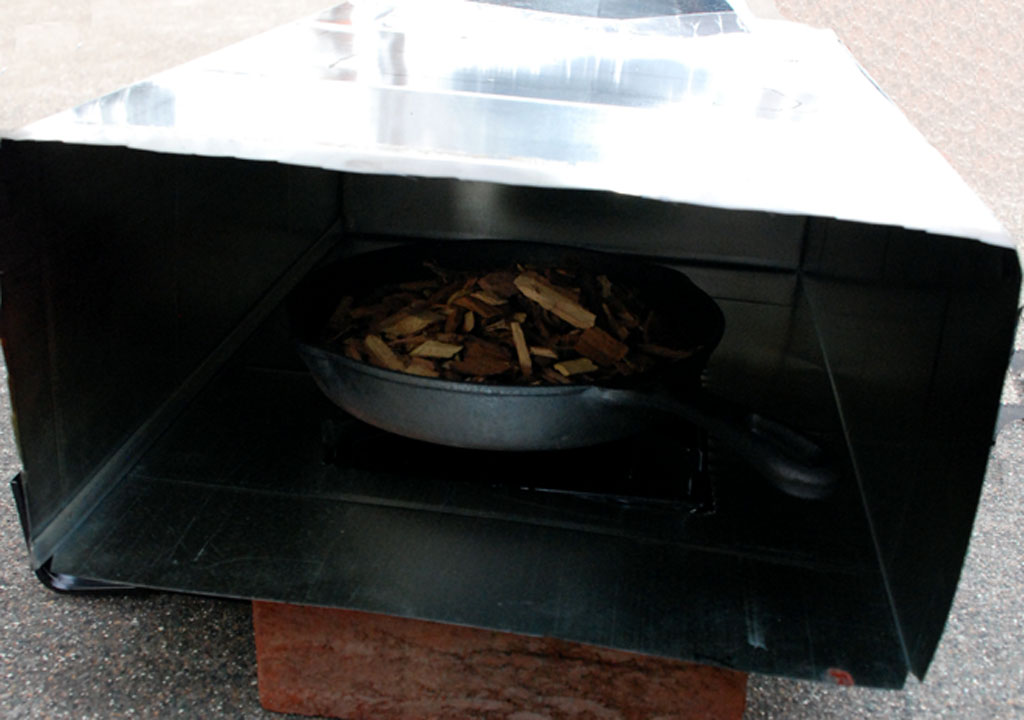
We then placed a cast iron pan on the “now safe burner” and added wood chips for the smoke.
So now we have smoke being generated in the Hot Chamber which then cools a bit in our vent pipe before it reaches the BBQ where it passes through a layer of ice to cool it further before it hits our delicious pork bellies that are just waiting to be packed with flavour!
More about MAKIN’ BACON to follow!
Stay Tuned!
Comments
7 responses to “Makin’ Bacon Part 1: DIY Cold Smoker”
Eric & Dave, it was really cool to have you guys over ”MAKING BACON”, it was fun seeing you guys at work; from making the smoke box. to setting up, do some fine tuning and getting the cold smoke going! Now that you’ve got it down packed, I’m anxious to see what will be smoked next; salmon, sausage are the first that come to mind. Most of all, I enjoyed the good company and sampling of the finished product.
[…] Eric and I got together last weekend to smoke some Bacon – check out the article over on FineDiners.ca about how we built our own cold smoking rig with some bits and pieces from Home […]
This sort of reminds of the scene from Apollo 13 where they have to put a square peg into a round hole to convert a C02 scrubber. Very cool.
Cool. I’m thinking of making one of these but with an electric hot plate as the heat source. And where in Ottawa did you get the meat for the bacon?
We bought the pork belly at Lavergne Western Beef outside of Ottawa in Navan, but you should be able to get it from any local butcher. We should have a writeup coming soon on the curing process as well.
[…] so busy in and out of the kitchen, I haven’t had a chance to sit down and write the follow up to Makin’ Bacon. Now that I have some spare time and have peaked your interest with the Sci-fi smoker, here’s […]
[…] First render down some bacon in a heavy pan over low heat until it’s nice and crispy. I used about a pound of the Bacon that Finediner Eric and I made in the spring – smoky deliciousness! […]